Prepare a 3D model for printing
Take a photo or a finished model to a file your slicer can print: make the figure, repair it, size it, split it and color it with the print tools.
Guide 8 of 103D printingIntermediate7 min read
A printable model is a closed solid at the size you will print it. This guide walks the route in order and says which steps cost credits and which run free in your browser. Skip any step the model does not need: a single-color figure that fits your bed needs only the repair check and the size and export step. For the route as a checklist, see How to 3D print an AI model.
Step 1: Make a model worth printing
- Starting from a photo of someone, or of an animal at home, use the 3D Figurine Maker. Pick a template (Realistic figurine, Chibi figure, Pet figurine, Building-block figure, Marble bust or Fridge magnet), add a photo and restyle it. It is two runs, a styled image and then the 3D model, and it shows the cost of both. Check the styled image: if the figure is whole, centred and on a plain background, it is ready, and Make 3D opens Image to 3D with the picture and the template's recommended model set. Nothing is charged for the 3D model until you confirm there.
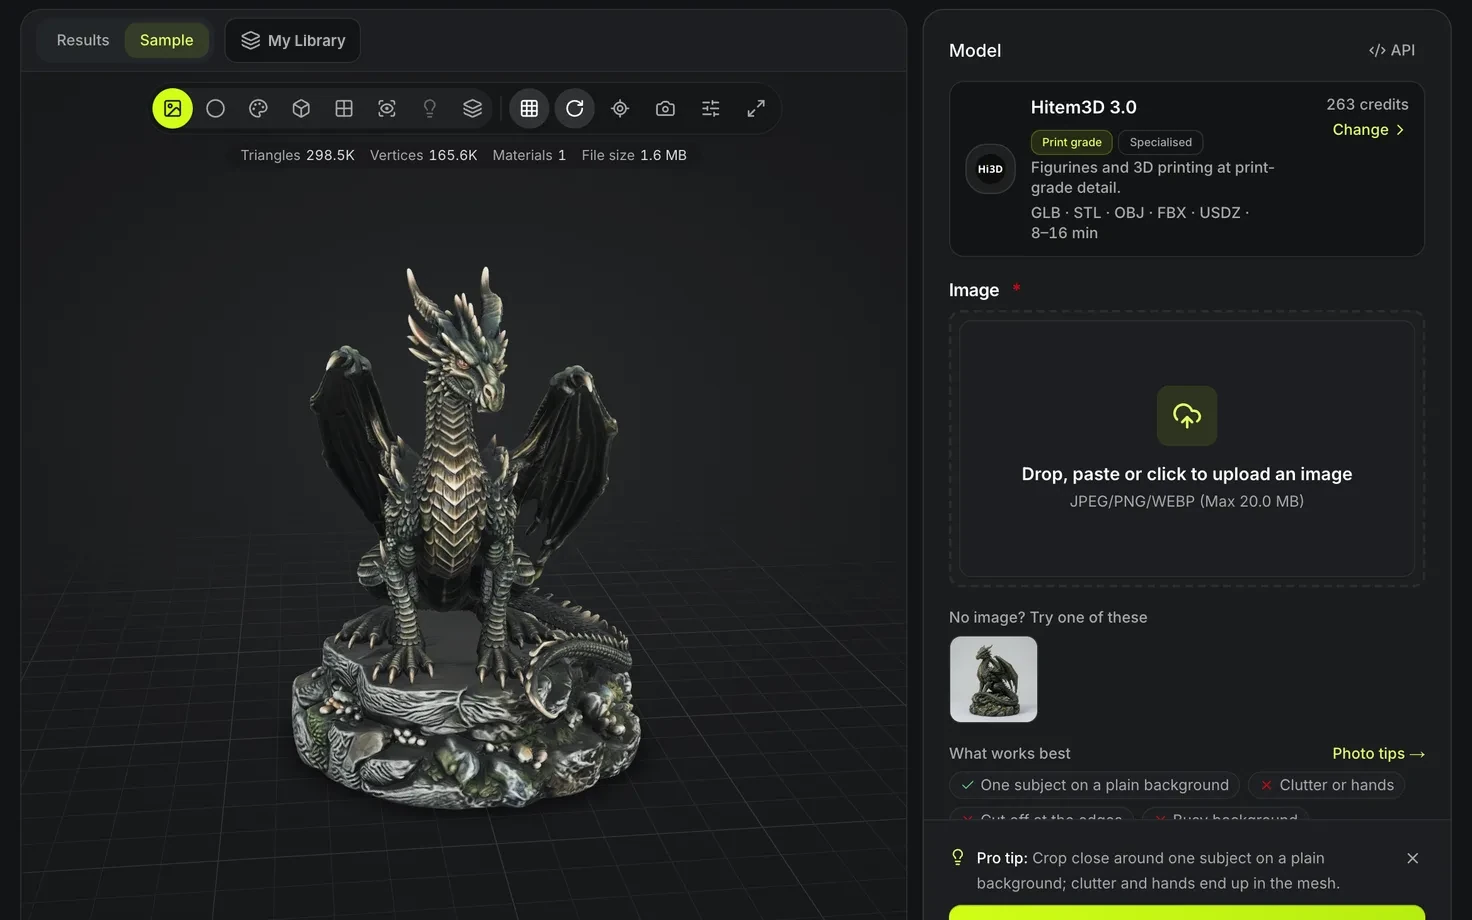
- From any other picture, follow How to make a 3D model from a picture. Hitem3D 3.0 is the model picked for figurines and printing at print-grade detail, and it returns STL directly. Print-ready models covers it.
Step 2: Inspect the mesh
In the result viewer, switch to Clay and Wireframe. Clay hides the texture, so holes, lumps and thin spikes show before you spend filament on them. Thin parts that look fine at a large size can be thinner than your nozzle at a small one.
Step 3: Repair the model and hollow it for resin
3D Model Repair is free and runs in your browser.
-
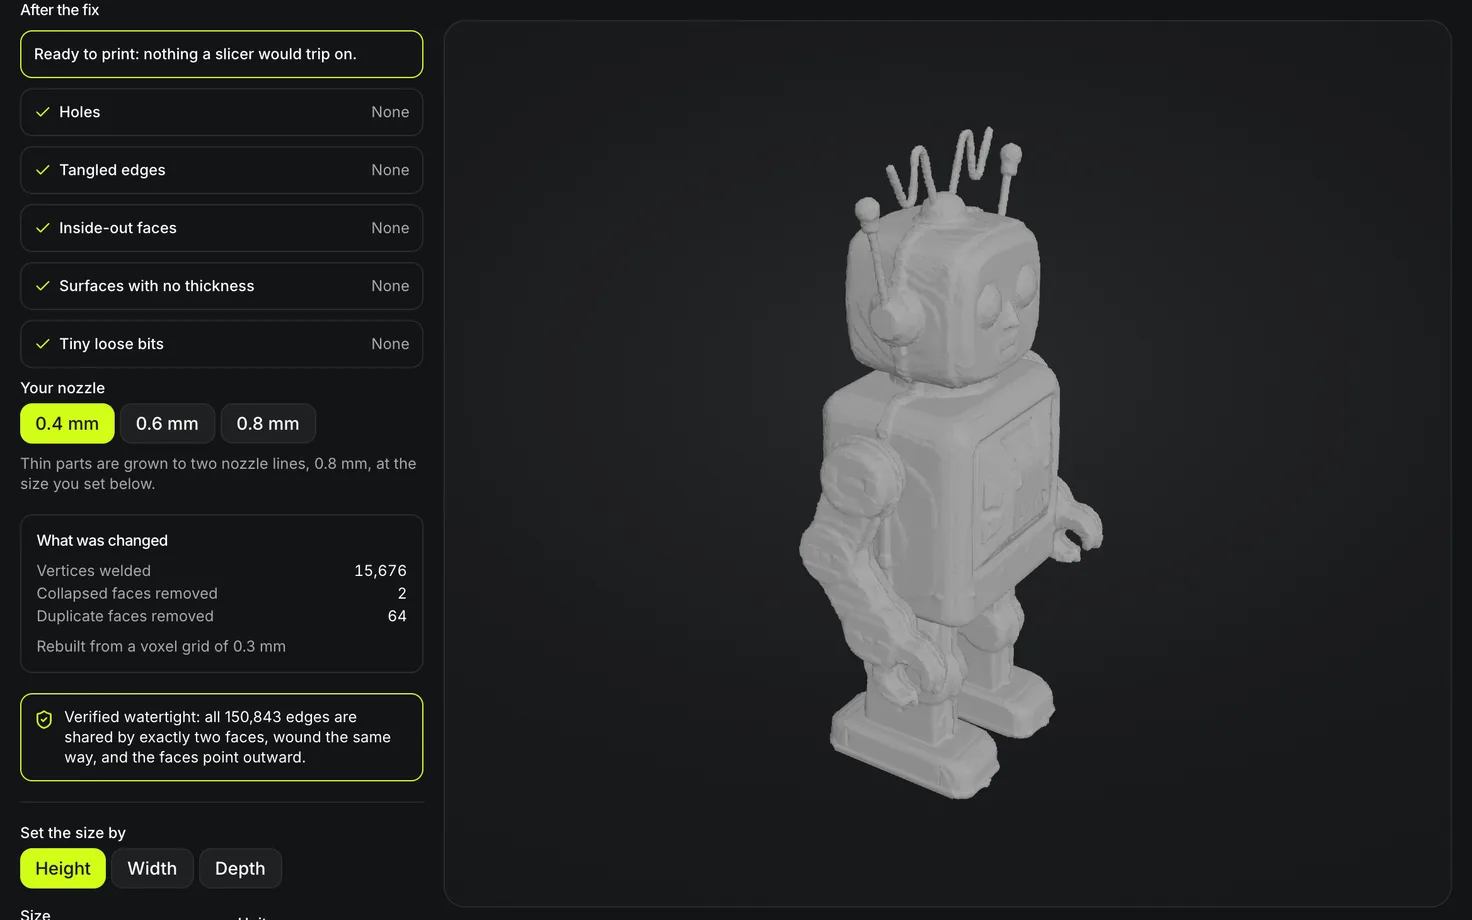
Press Open a 3D model and choose a GLB, glTF, OBJ, STL, 3MF, FBX or PLY file, or check a model made on this site. The check opens on Check results, with five rows: Open edges, Edges shared by more than two faces, Flipped normals, Zero-thickness walls and Small floating pieces. Point it out on a row turns the model to the first case and marks it in color; press it again for the next one.
-
Press Fix everything. The tool reports what it changed and, when the repair worked, shows Verified watertight with the number of edges it checked. Use Before and After to compare. If a problem needs a rebuild rather than a patch, or some walls are still thinner than your nozzle needs, Rebuild as one closed surface remakes the model as one closed surface with every wall at least that thick, and detail finer than its grid is smoothed.
-
For resin printing, use Hollow for resin printing: set the Wall thickness, the number of Drain holes and the Hole diameter, then press Hollow at this size. Hollow after you set the size, so the wall is measured on the print. The drain holes let uncured resin leave the cavity.
-
Set the size by Height, Width or Depth in millimetres, centimetres or inches, then download STL, 3MF, OBJ or GLB, or pick Add a base under Continue with this model to carry the repaired file to Step 4 without downloading it. STL and OBJ carry shape only, so textures and colors are dropped. A model that needs no repair can be sized in Resize 3D model instead: an exact height or longest side in mm, cm, m or inches, with its textures kept.
Step 4: Give it a base
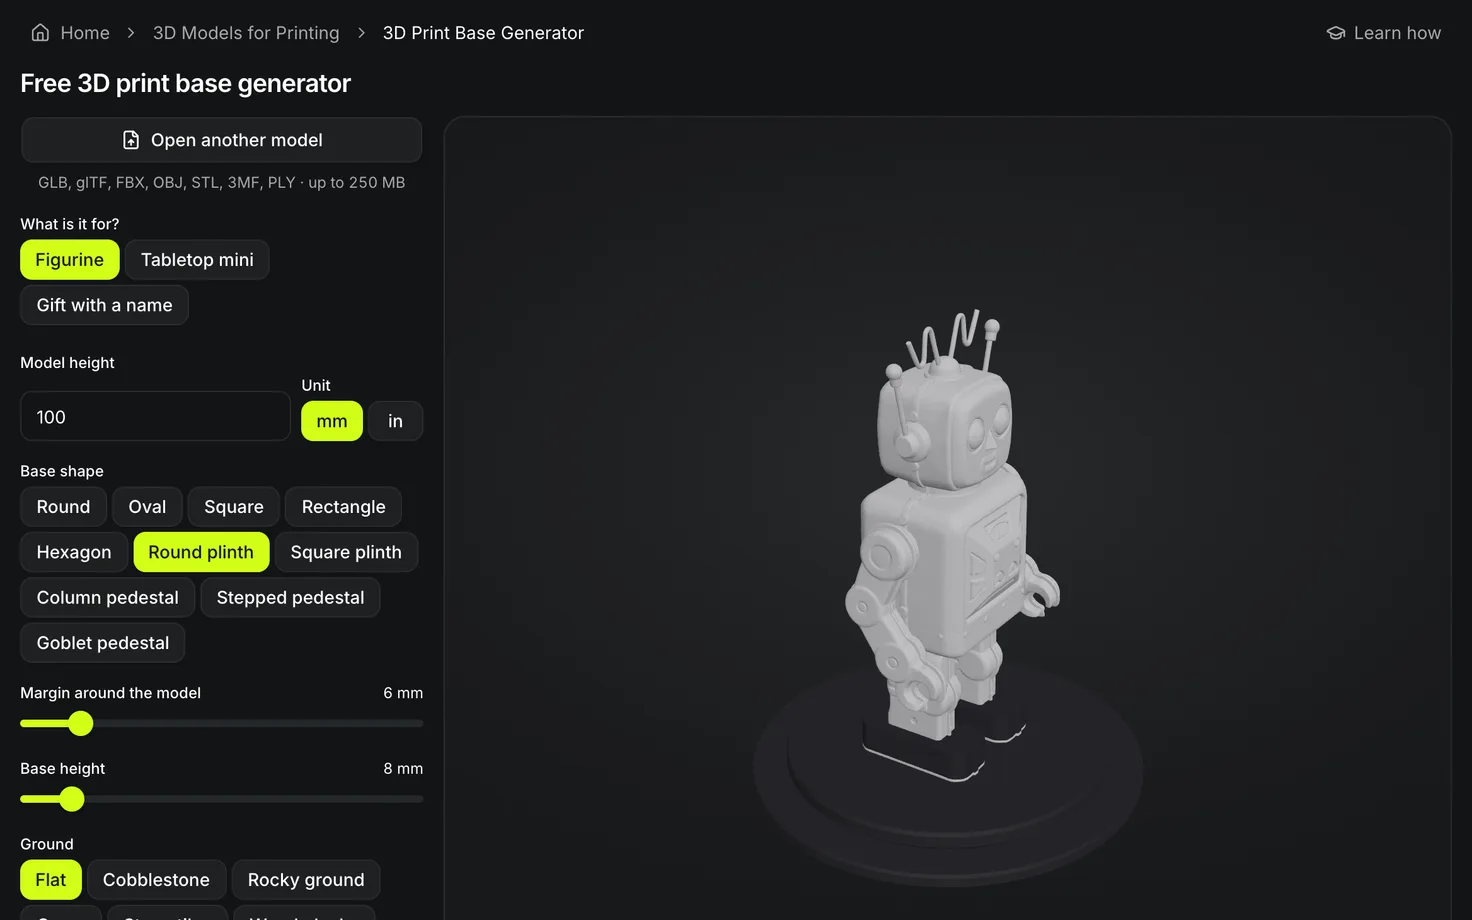
3D Print Base Generator is free and runs in your browser. Choose what it is for (Game miniature, Display piece or Personalized keepsake), then a Base shape: Round, Oval, Square, Rectangle, Hexagon, Round plinth or Square plinth, or a sculpted pedestal (Column pedestal, Stepped pedestal or Goblet pedestal). Pick the Ground (Smooth, Floorboards, Flagstones, Round cobbles, Broken rock or Lawn) and a Magnet pocket underneath if you want one. Under Text on the base, Add to the base takes Text or a Logo, with Placement on the Front face or the Bottom. The base joins the model into one solid piece, widens if the model could tip, and checks that it fits Your printer. Then download 3MF for Bambu Studio, Orca, Prusa, an STL or a GLB. It patches small faults in the model first, but run Step 3 for one that is badly broken.
Step 5: Size the model and export
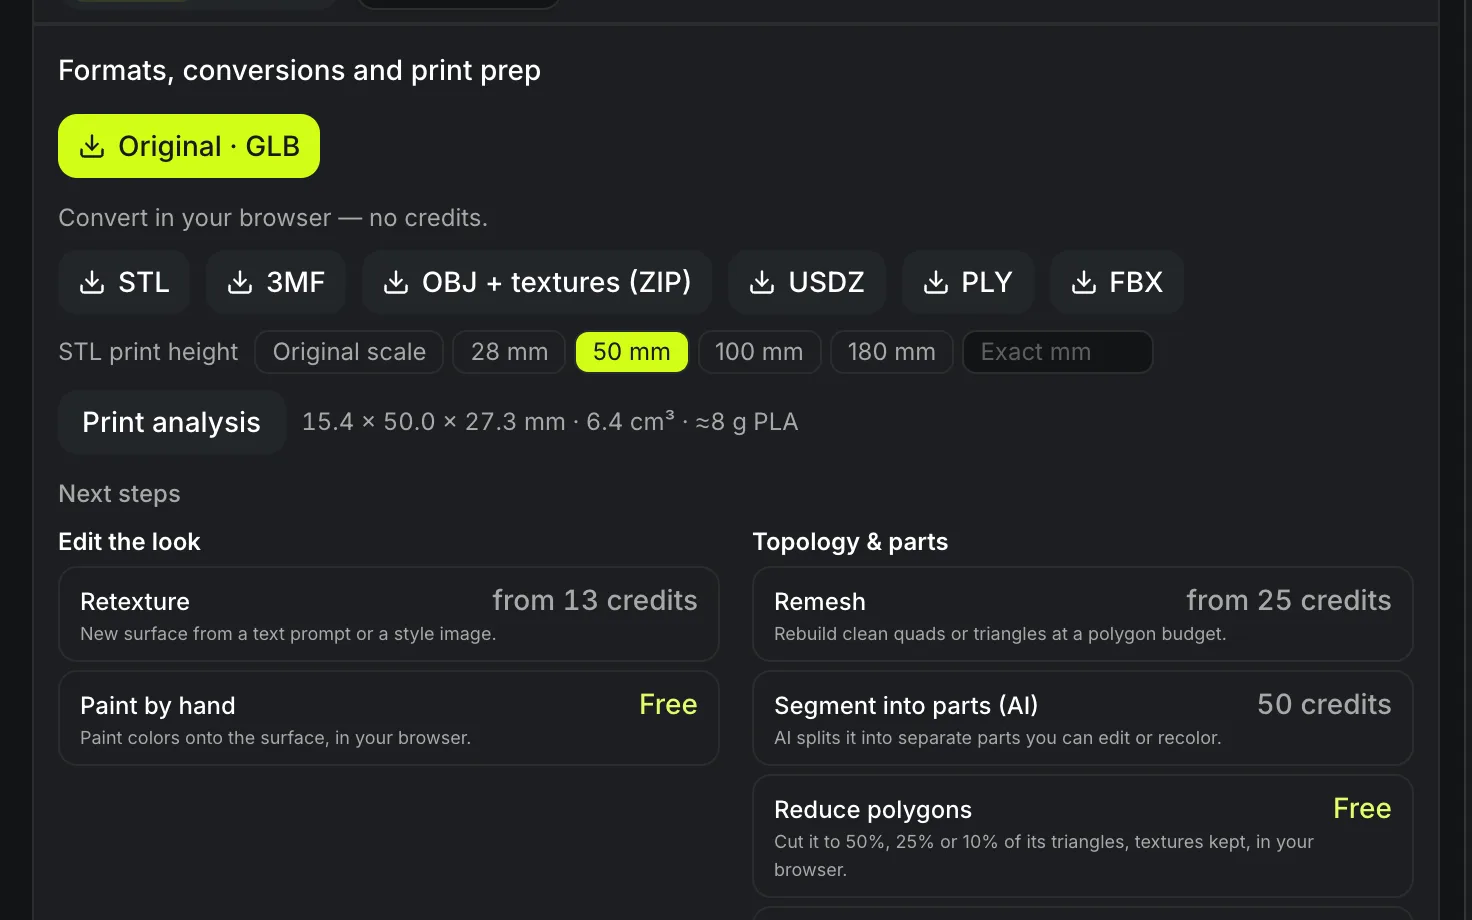
Open the arrow beside Download on a result, Other file types and printing. Under the free conversions, STL print height sets the size of an STL or 3MF export: Original scale, or 28, 50, 100 or 180 mm. Print analysis then reports the size in millimetres, the volume and an estimate of the grams of PLA for a solid print. Infill and walls in your slicer lower the real amount, so treat the figure as a ceiling.
Step 6: Split it if it is bigger than the bed
| Tool | Cost | How it cuts |
|---|---|---|
| 3D Model Splitter | Free | Flat cuts along an axis you choose, with optional plug or dowel connectors. Runs in your browser. |
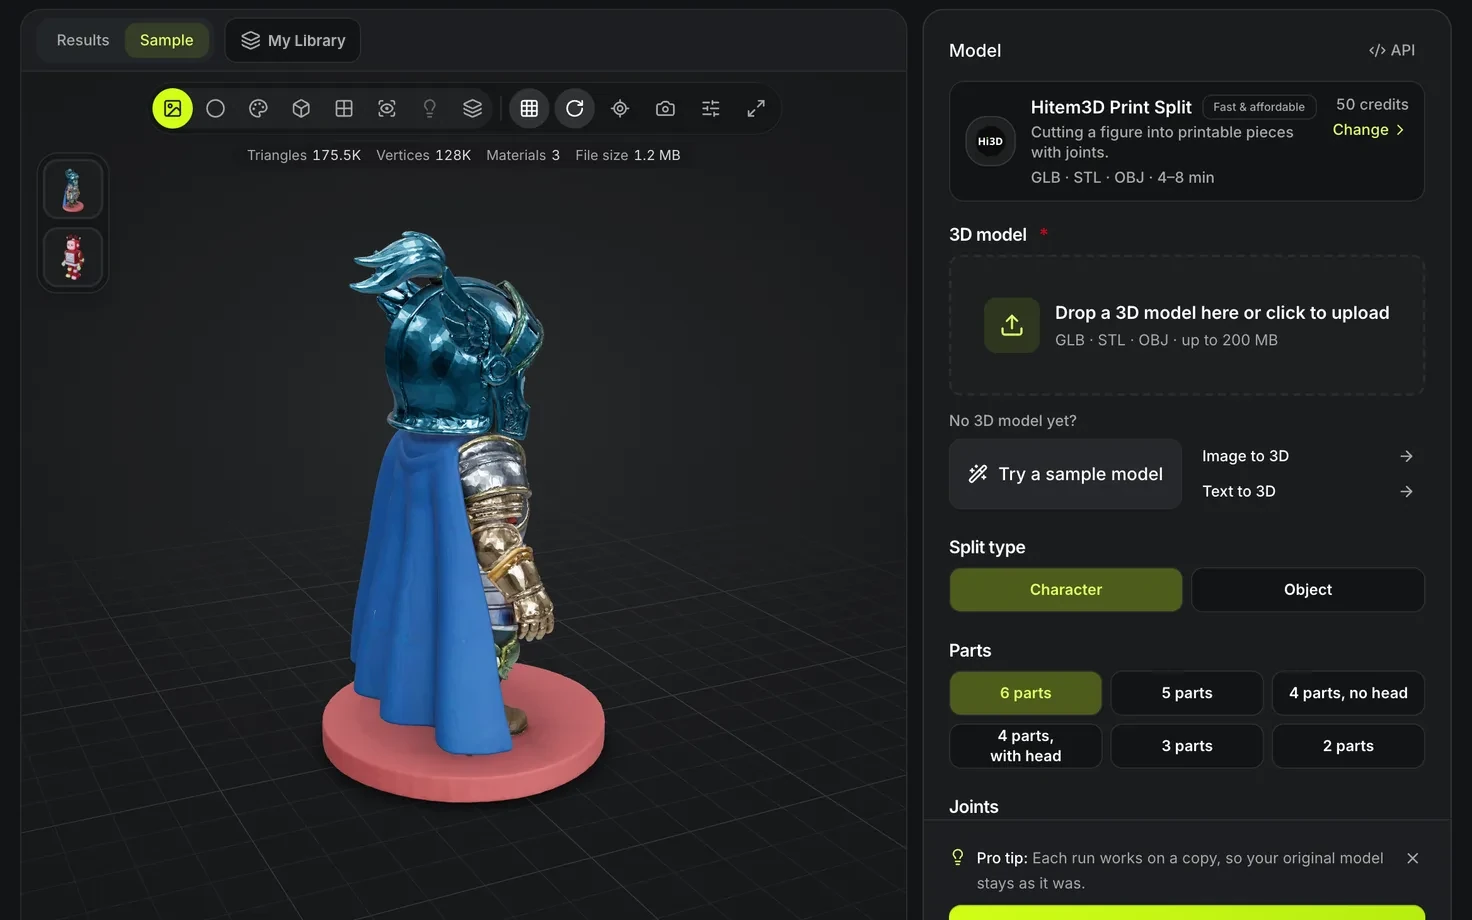
| Split for printing | Credits | Hitem3D Print Split: Character mode cuts a figure into 2 to 6 parts with ball or dovetail joints, and Object mode splits any object by Low, Medium or High granularity. |
- In the 3D Model Splitter, pick the Cut axis and the Cut position, press Cut selected part, and repeat on any part. Connector offers None, Plug (peg + socket) or Dowel (separate pins), with a Fit of Tight, Standard or Loose because printers differ. Download each part or Download all parts (ZIP). The splitter needs a watertight mesh; if it refuses the model, repair it or remesh it first.
- Split for printing reads GLB, STL or OBJ. A character split returns a GLB, so convert its parts to STL in the download panel before slicing; an object split can return GLB, STL or OBJ directly. Joint fit depends on your printer, so print one joint first.
Step 7: Reduce the texture to filament colors
| Tool | Cost | What it does |
|---|---|---|
| Filament colors (3MF) | Free | Splits a textured model's colors into filaments in your browser and downloads a 3MF for Bambu Studio, OrcaSlicer or PrusaSlicer, or OBJ with colors. |
| Multicolor print | Credits | Hitem3D Multicolor reduces a textured GLB to 2, 4, 6 or 8 filament colors, or Max, as clean color regions. |
In Filament colors (3MF), choose to print in One color or Several colors. For several, take the suggested Filament colors, use Merge similar colors to fold close shades into one spool, and set your nozzle so patches thinner than it are folded away; hover a swatch to light its area, then match it to the filament you will load. With Multicolor print, soft gradients turn into bands at low color counts. In your slicer, map each color region to a filament slot.
Step 8: Slice
Open the STL or 3MF in your slicer and let it repair any errors it reports. Generated models come without supports, so add them under arms, chins and other overhangs.
Printable things that do not start from a model
- 3D Relief Generator turns a photo, logo or drawing into a printable relief.
- Lithophane Maker makes a backlit print from a photo.
- 3D Text Generator builds lettering and name plates, and downloads GLB or STL for printing.
- SVG to 3D extrudes the filled shapes of an SVG logo or icon into a model.