How to make a 3D model from a picture
Prepare a picture, pick a model, read the cost, generate, then download the file or take the result into the next tool, step by step on the Image to 3D page.
Guide 1 of 10Getting startedBeginner8 min read
This guide covers one run on the Image to 3D page, from the picture to the file. Generating needs credits from a plan or a credit pack.
Step 1: Choose and check the picture
- Open Image to 3D. Drop, paste or click in the picture field to add one image. The default model, Tripo H3.1, reads JPEG or PNG files up to 20 MB. Other models list their own limits in Prepare an image for 3D.
- Before you add a picture, the form shows What works best. One subject on a plain background works well. Clutter or hands, a subject cut off at the edges, a busy background and hard shadows work against you. A strip headed No image? Try one of these offers sample pictures.
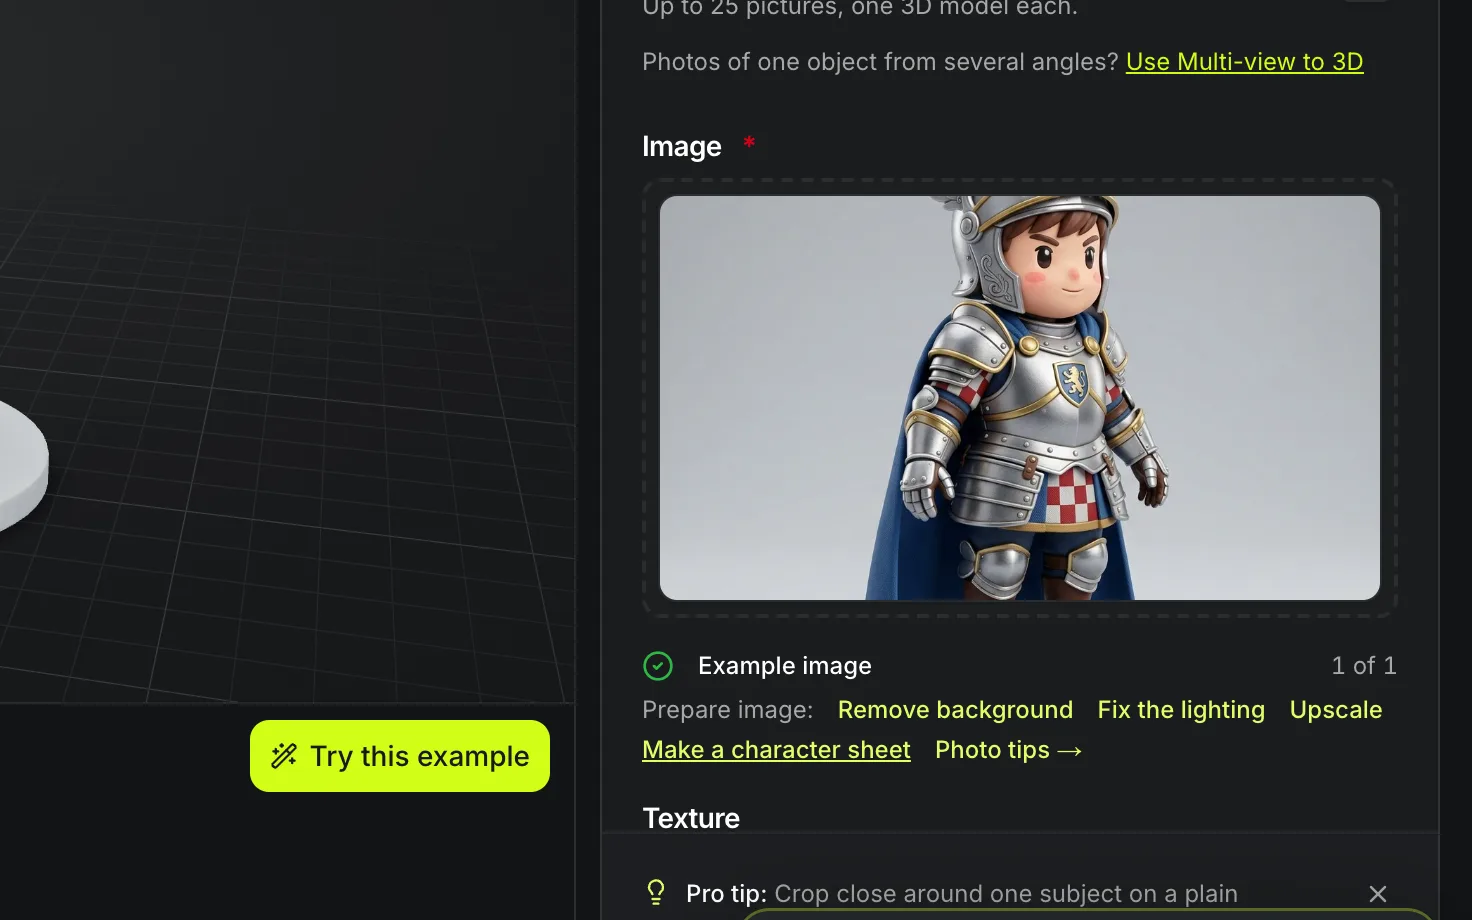
- Once a picture is in, the line under it confirms Image ready. Use the Crop button on the picture to frame one subject: the Crop the picture window offers a free shape and fixed shapes, and Use this crop replaces the picture with the cropped file.
- The same line offers Prepare image links. Remove background, Fix the lighting and Upscale open those tools with your picture already loaded, and Photo tips opens Prepare an image for 3D. Run them before you spend credits on the model.
Step 2: Pick a model
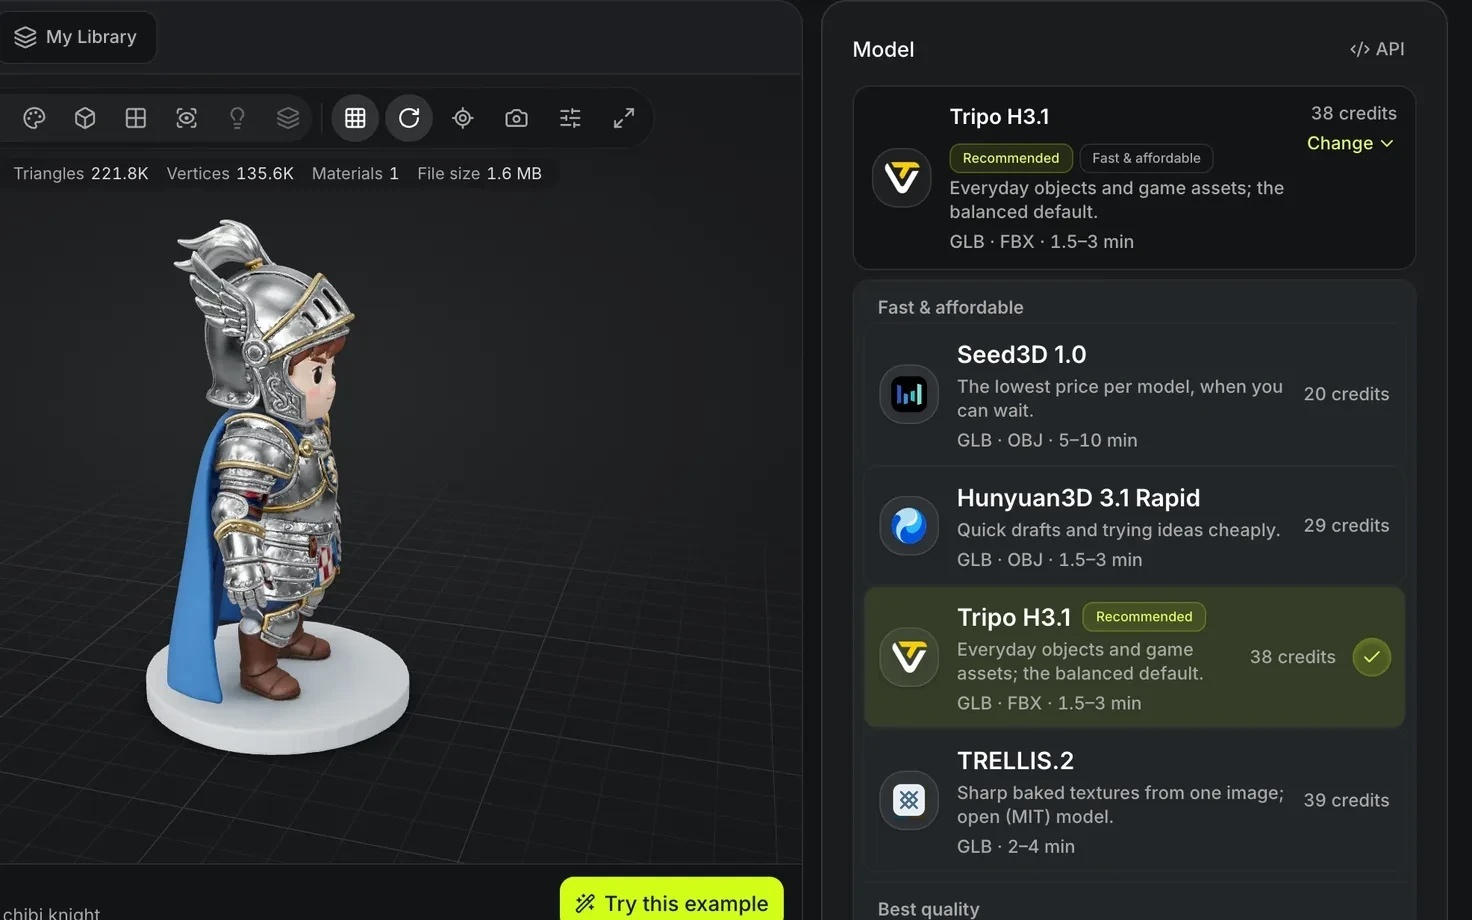
The model card under the picture shows the selected model with its badges, what it is best for, the file formats it returns and a typical run time. Tripo H3.1 is preselected and carries the Our pick badge.
- The chips under the card switch models in one click: one model from each group, plus the model you have chosen.
- Change and All models open the full list, grouped as Fast & affordable, Best quality, Specialised and More models, cheapest first in each group. Every row shows its price in credits.
- Compare AI 3D models lines the models up by credits, formats and run time.
- Some pages open this form with their own model list: Low poly 3D model generator has only Tripo P1, Image to Gaussian splat only TripoSplat, AI 3D models for games seven of these models, and AI 3D model generator every model here plus Hunyuan3D Sketch.
Step 3: Set the options
Below the card the form lists the options of the selected model. On Tripo H3.1 the main ones are Texture (None, Standard or Detailed), PBR materials (when a texture is on), Mesh quality (Standard or Detailed) and Topology (Triangle or Quad). A collapsed advanced section holds settings such as Face count, Orientation, Real-world scale, Texture alignment and the seeds. Other models show their own options.
Most choices carry a one-line hint and, when they change the price, how many credits they add or save. Choosing None for Texture returns an untextured grey mesh, which is the fastest and cheapest run; you can add a texture later with Retexture, as How to retexture and remesh a 3D model shows.
Step 4: Generate
- Read the cost line beside the Generate button. It gives the credits for this model and these options, with an estimated time.
- Press Generate. The progress card moves through Queued, Building the model and Finishing and saving, and shows the time elapsed and the usual range for the model.
- You can leave the page. The result is kept in My Library, and Notify me when it's ready asks your browser for an alert.
- A run cannot be cancelled once it starts. If one stalls, it fails on its own and the credits reserved for it go back to your balance.
Your plan sets how many generations run at once. At the limit the form says so and nothing is charged; start the next run when one finishes.
Step 5: Review and download
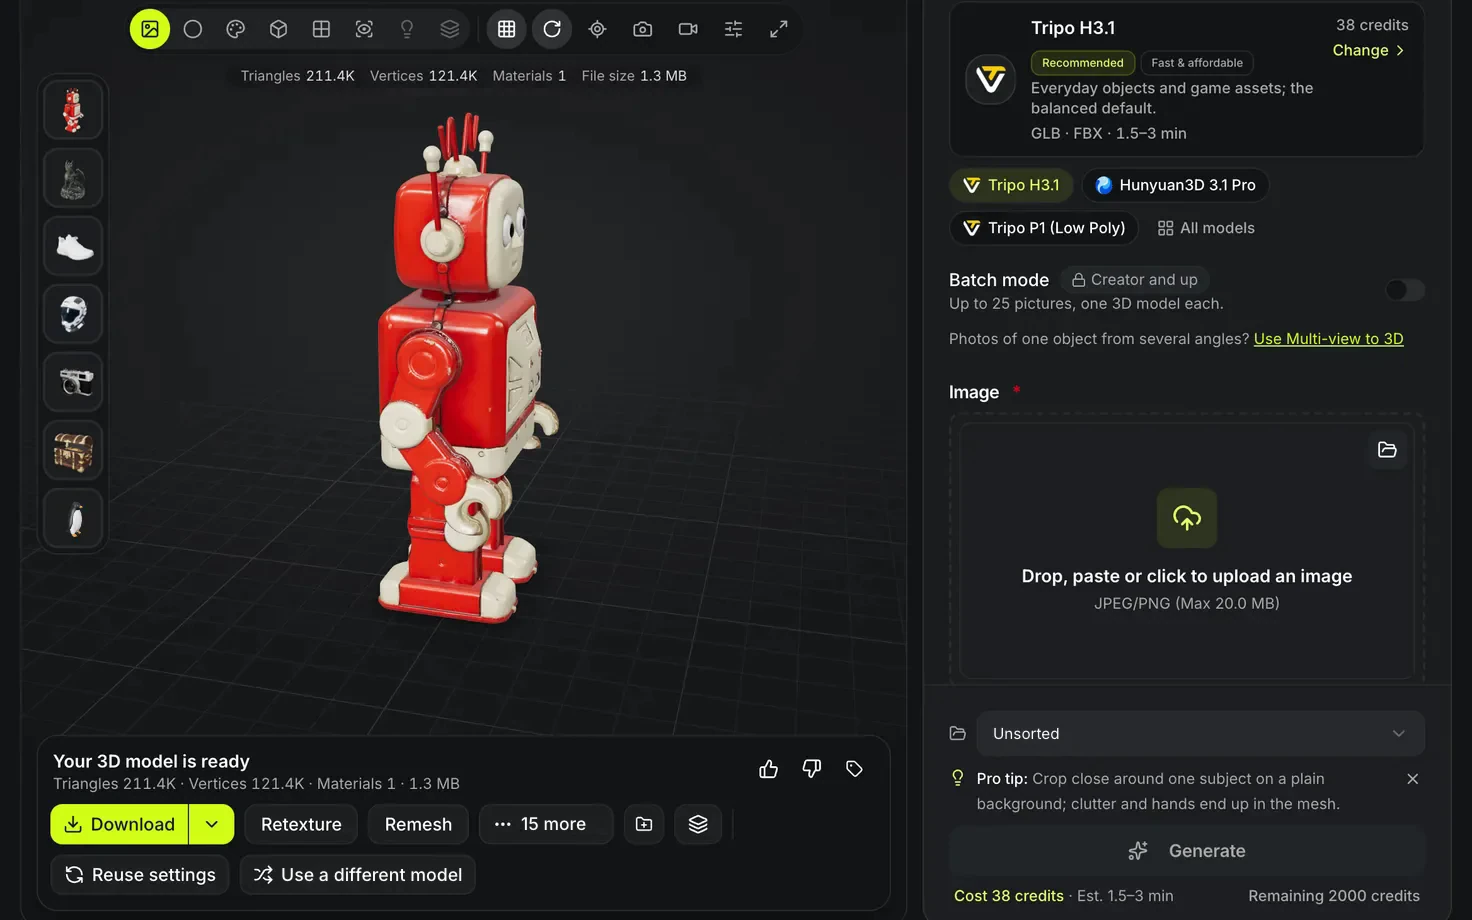
When the run finishes, the panel reads Your 3D model is ready and lists the triangle, vertex and material counts of the file.
-
Orbit the model in the viewer. The view modes include Textured, Clay, Wireframe and UV checker. Clay hides the texture so holes, lumps and thin spikes show, and Wireframe shows the edge flow.
-
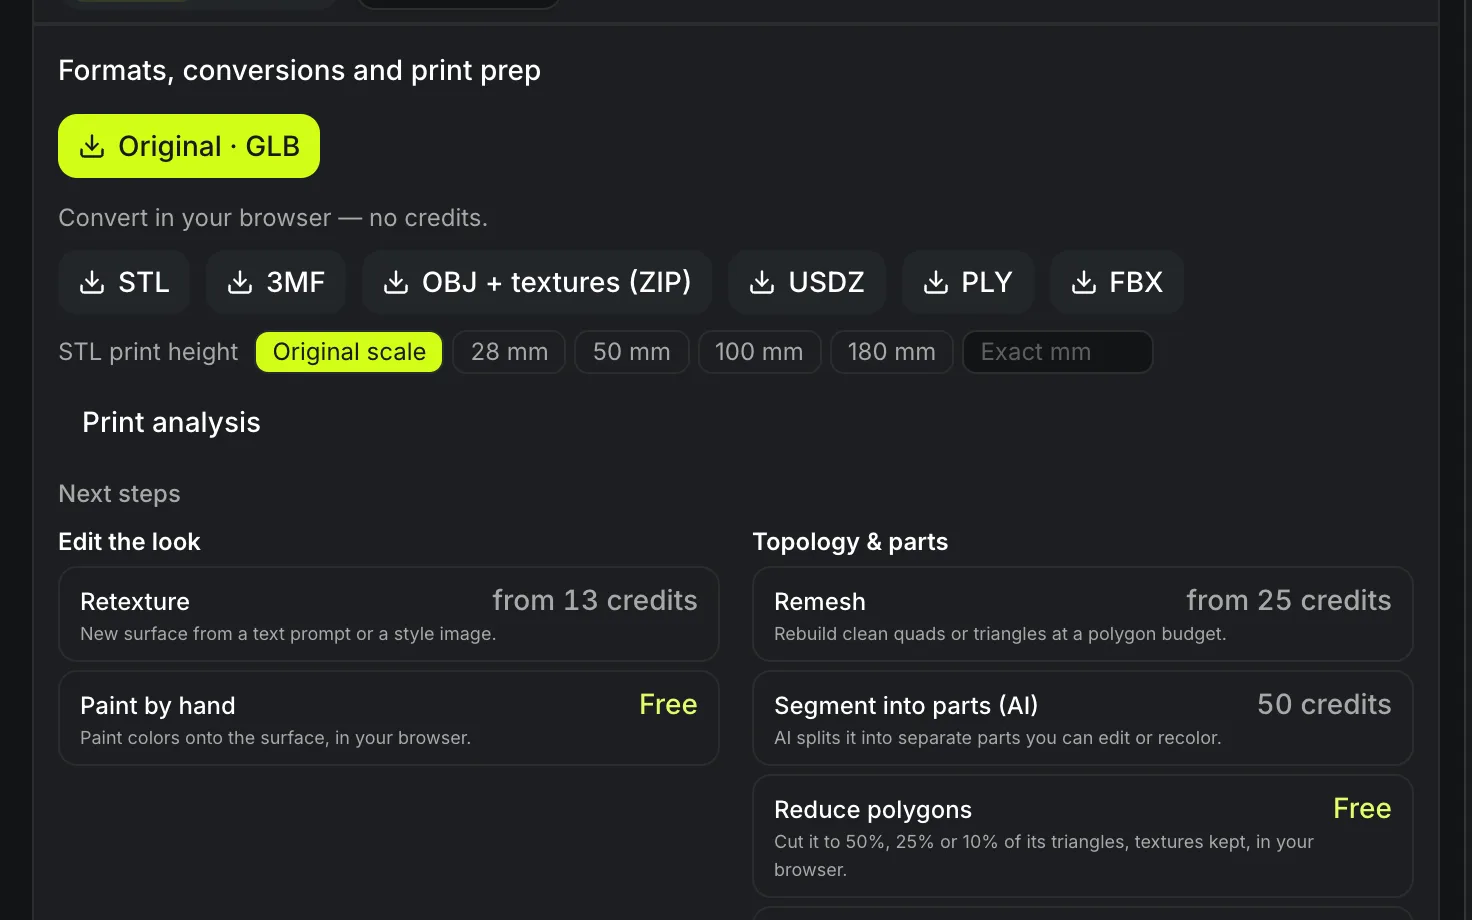
Press Download to save the file the model returned. The arrow beside it, Other file types and printing, opens Formats, conversions and print prep: the other files the model returned, and free conversions in your browser to GLB, OBJ with textures (ZIP), STL, 3MF, USDZ, PLY and FBX. STL and 3MF exports take their size from the STL print height row: Original scale, or 28, 50, 100 or 180 mm. 3D file formats explains which to take.
-
Press Details to see How this was made: the input, the model, the credits used and the time taken.
-
Reuse settings loads the same inputs and options back into the form. Use a different model keeps the inputs and switches the model; press Generate when you are ready.
-
The thumbs-up and thumbs-down buttons rate the result.
Step 6: Take the model further
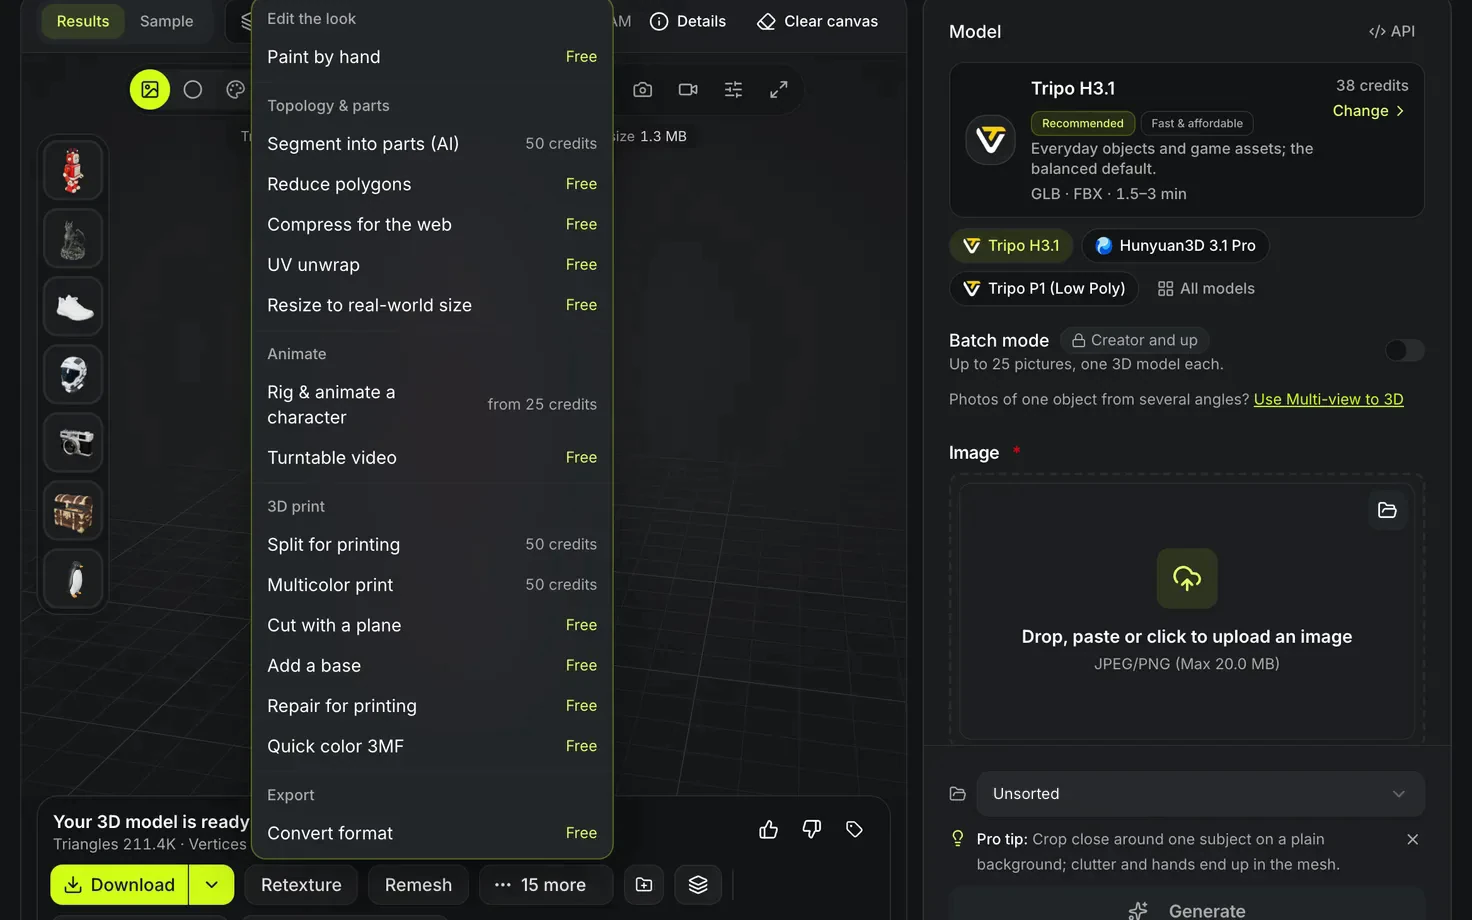
The bar along the bottom of the canvas shows two quick buttons and a More menu. The menu groups every next step and prices each one before you click: Free, a number of credits, or from a number of credits. The same steps are in this table.
| Group | Button | Cost |
|---|---|---|
| Edit the look | Retexture | Credits |
| Edit the look | Paint by hand | Free |
| Topology & parts | Remesh | Free |
| Topology & parts | Segment into parts (AI) | Credits |
| Topology & parts | Reduce polygons | Free |
| Topology & parts | Compress for the web | Free |
| Topology & parts | UV unwrap | Free |
| Topology & parts | Resize to real-world size | Free |
| Animate | Rig & animate a character | Credits |
| Animate | Add animations | Free |
| Animate | Animate as a video | Credits |
| Animate | Turntable video | Free |
| 3D print | Split for printing | Credits |
| 3D print | Multicolor print | Credits |
| 3D print | Cut with a plane | Free |
| 3D print | Add a base | Free |
| 3D print | Repair for printing | Free |
| 3D print | Filament colors (3MF) | Free |
| Export | Change file type | Free |
| Export | Open in the splat viewer | Free |
Every button opens the tool with this model already loaded. Free tools run in your browser. Add animations appears only after a rig result. A Gaussian splat has no surface for the mesh tools, so its result offers only Open in the splat viewer.
Several pictures at once
Switch on Several pictures in the form to add many pictures and get one 3D model from each, up to 25 pictures. Several pictures is included with the plans that run four generations at once or more: Creator, Studio and Team. Credit packs run two at once, one picture per run. The model and settings in the form apply to every picture, and the button becomes Generate N 3D models with the total shown as credits per model times the number of pictures.
The batch runs on our servers, so closing the tab is safe: it keeps going and the models appear in your history as they finish. Pictures start as your plan's concurrency allows, and each model is charged only when it starts, so a picture that never starts costs nothing. Tick the email box and we send one email when the whole batch has finished, not one per picture.
The batch panel above the viewer shows every picture as waiting, running, done or failed. Retry failed runs the failed ones again as new runs, Download all (ZIP) saves every finished model in one file, and Add all to project files them together. Several photos of one object from different angles belong in Multi-view to 3D instead, where they make one better model.
Other ways to start
- Text to 3D builds a model from a written description.
- Multi-view to 3D builds one model from several views of the same object.
- Sketch to 3D builds a model from line art.