
Share credits with a team and use the API
Buy a Team plan, invite people by email or join code, switch workspaces, and create API keys with scopes, expiry, an IP allow-list and a credit limit.
Guide 9 of 10Teams and APIAdvanced5 min read
Two settings areas extend the studio beyond one person at one keyboard: a team that draws on one shared credit pool, and API keys that let your own code start generations. Both live under Settings, which opens from the account menu in the sidebar.
Teams
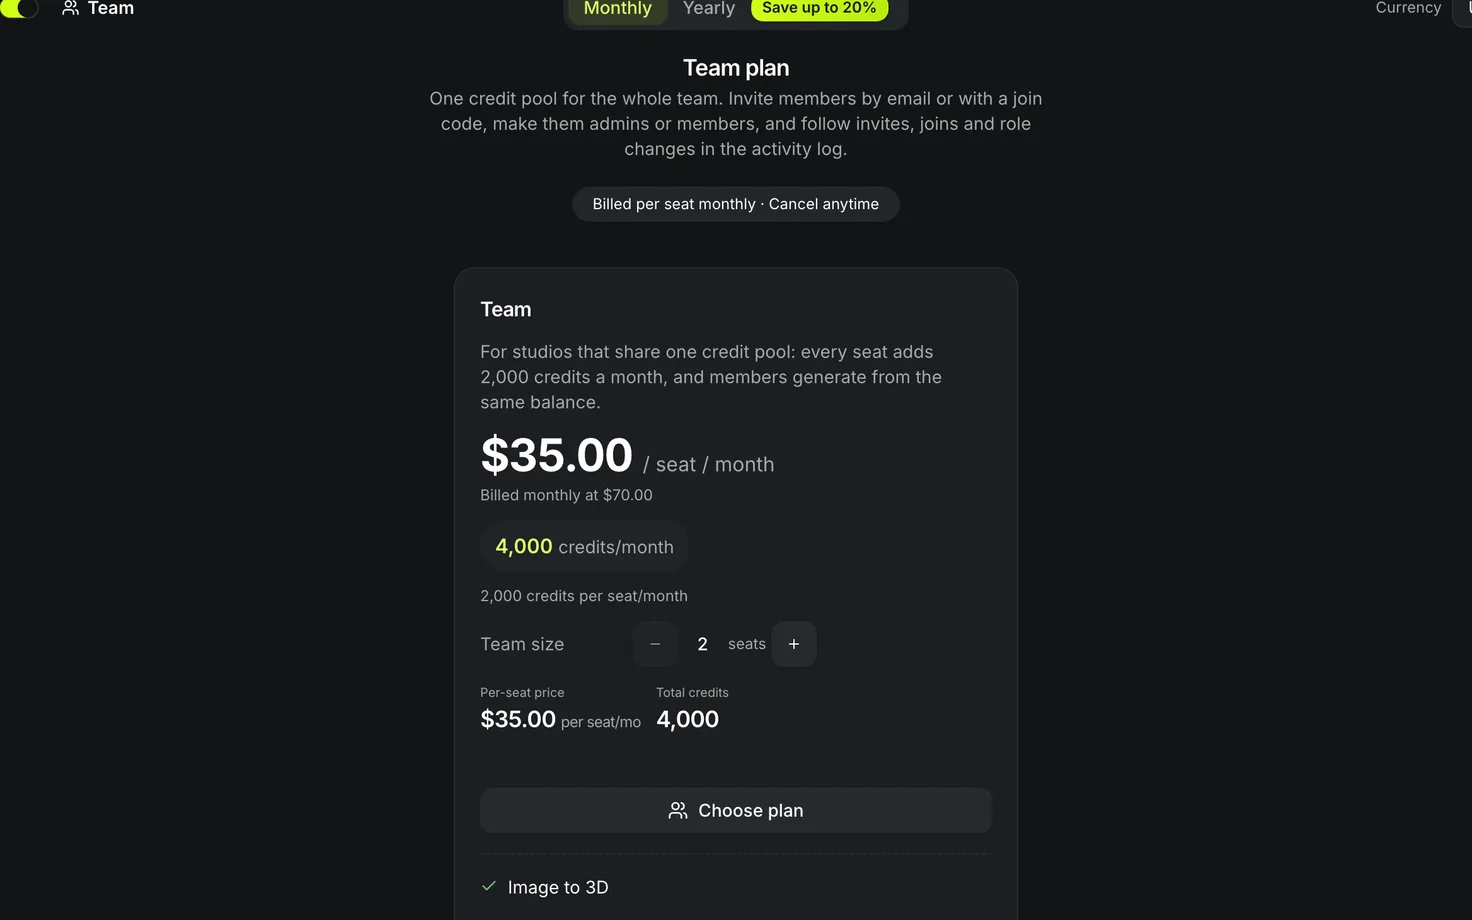
Step 1: Buy a Team plan
The Team plan on Pricing is billed per seat and starts at 2 seats. Every seat adds 2,000 credits a month to one shared pool that the whole team generates from. It costs $35 per seat a month, or $350 per seat a year; a yearly plan still delivers the pool month by month. Team plans include API access.
Step 2: Invite people
Open Settings and choose Team Members. Owners and admins see two ways to invite.
- Invite Member sends an email invitation. Enter the Email address, choose a Role of Admin or Member and press Send Invite. The page shows how many seats are used against the maximum.
- Invite codes hand out access without typing an address. Press Create invite code and choose:
- Role: Member or Admin. Only the team owner can create a code that grants admin.
- Expires after: 1, 7 or 30 days. The default is 7 days.
- Maximum uses: from 1 to 50 people. The default is 10.
- Email domain (optional): only people with a verified email on that domain can use the code.
The code is 12 characters, shown as XXXX-XXXX-XXXX, and it appears once. Copy the code or the invite link before you press I have saved this code; it cannot be recovered. Revoke a code at any time from the list, which shows each code's role, uses and expiry. Settings → Activity logs codes being created, revoked and redeemed, and invitations, joins and role changes.
Step 3: Join a team
- Open the invite link, or go to Join a team and enter the code. If you are signed out, you sign in first and come back to the same page with the code still attached.
- Press Continue. The page names the team, its owner and the role you will join as.
- Press Join team. The studio then switches you to the team workspace.
Your personal credits stay yours. While the team is your active workspace, generations use its shared credits. If the code is no longer valid, the team has no free seats, or the code is limited to another email domain, the page says which.
Step 4: Switch workspace
Every sign-in lands in your personal workspace. Open the account menu in the sidebar: when you belong to a team, a Workspace section lists Personal and each team, with the active one checked. Pick one to switch. Settings → Team also lists Your teams, with an Open team button for each.
What each role sees
Owners and admins can rename the team, manage the plan and billing, and manage members and invite codes. Members get a read-only team view. The team owner can make another member the owner, and anyone except the owner can leave the team.
API keys
API access comes with any paid plan or credit pack. A key belongs to the account, or the team, that created it, and every generation started with it bills that account's credits.
Create a key
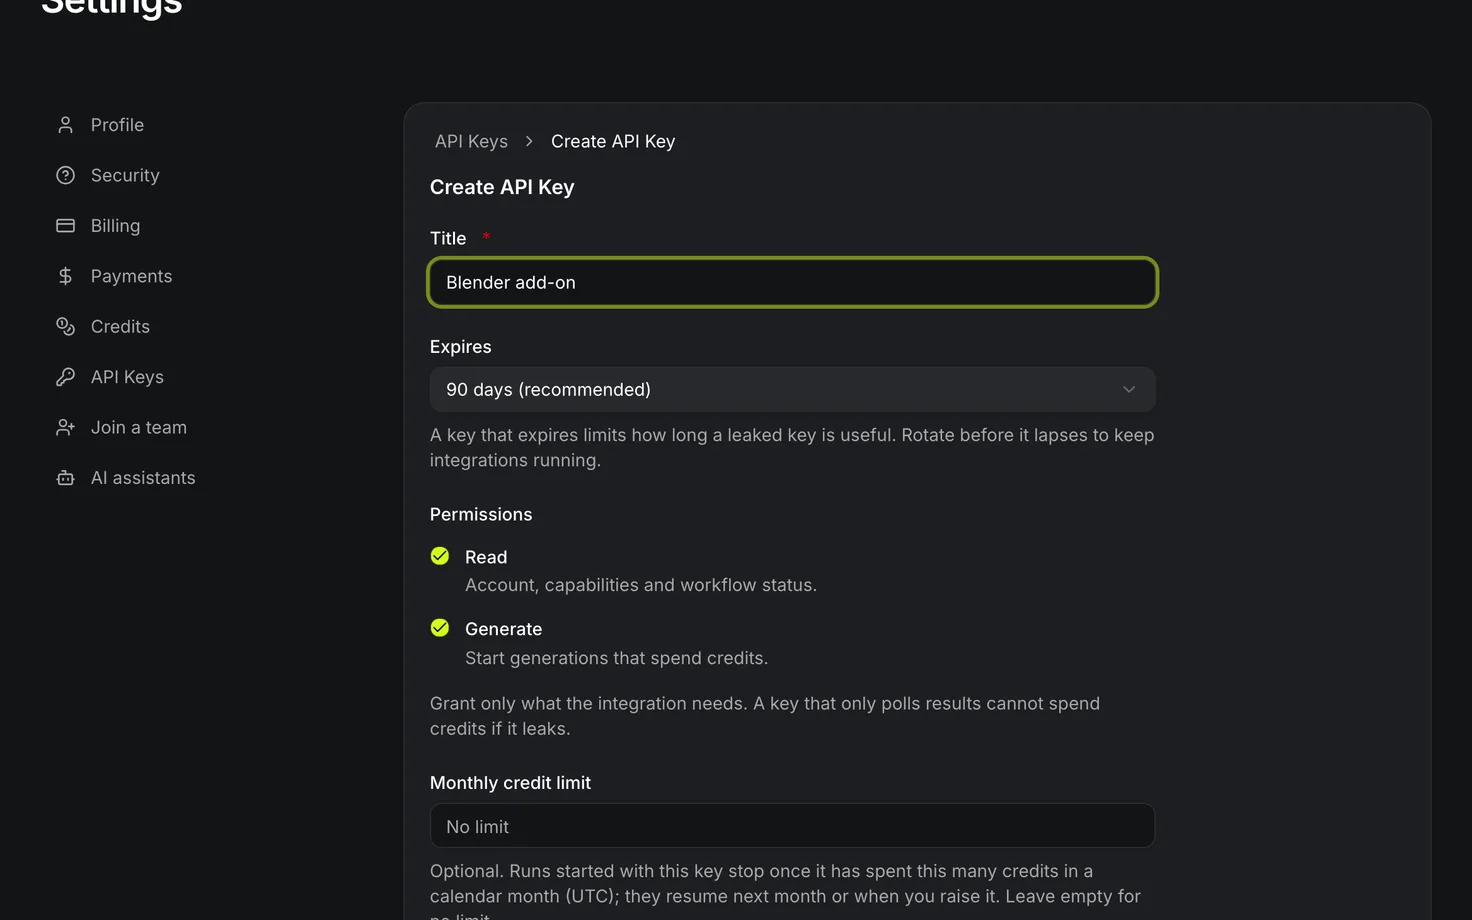
- Open Settings and choose API Keys, then press Create API Key.
- Fill in the fields:
- Title: a name for the integration.
- Permissions: Read covers account, capabilities and workflow status. Generate starts generations that spend credits. Grant only what the integration needs; a key that only polls results cannot spend credits if it leaks.
- Expires: 30 days, 90 days (recommended), 1 year or Never. A key that expires limits how long a leaked key is useful.
- Allowed IP addresses (optional): one IPv4 or IPv6 address or CIDR block per line, up to 20. Requests from anywhere else are refused.
- Monthly credit limit (optional): runs started with this key stop once it has spent this many credits in a calendar month, counted in UTC. They resume the next month or when you raise the limit. The list shows Credits this month for each key.
- Press Create. The key appears once in Your API key is ready. Copy it and store it somewhere safe before you press I have saved this key.
Rotate a key
Press Rotate on a key, then Mint replacement key. The replacement has the same name, and the current key keeps working until you delete it, so update your integration first, then delete the old key from the list.
Call the API
Send the key as a Bearer token. The developer documentation covers every route, the error codes and the rate limits, and it is the place to start:
- Quickstart: create a key and make a first call.
- Authentication: key format, scopes, expiry, IP allow-lists and monthly credit limits.
- MCP connector: drive the studio from an MCP client; its tools check the same scopes.