Organize your 3D models and pictures in the Library
Find, tag and file your work in My Library, keep busy projects and tags in Quick filters, and reuse a finished result as the input of the next run.
Guide 3 of 10Make and refineBeginner6 min read
Every finished run is saved in My Library, your library. This guide finds work again, tags it, files it in projects, keeps the projects and tags you use most one click away, and sends a result on to the next tool.
Step 1: Find a creation
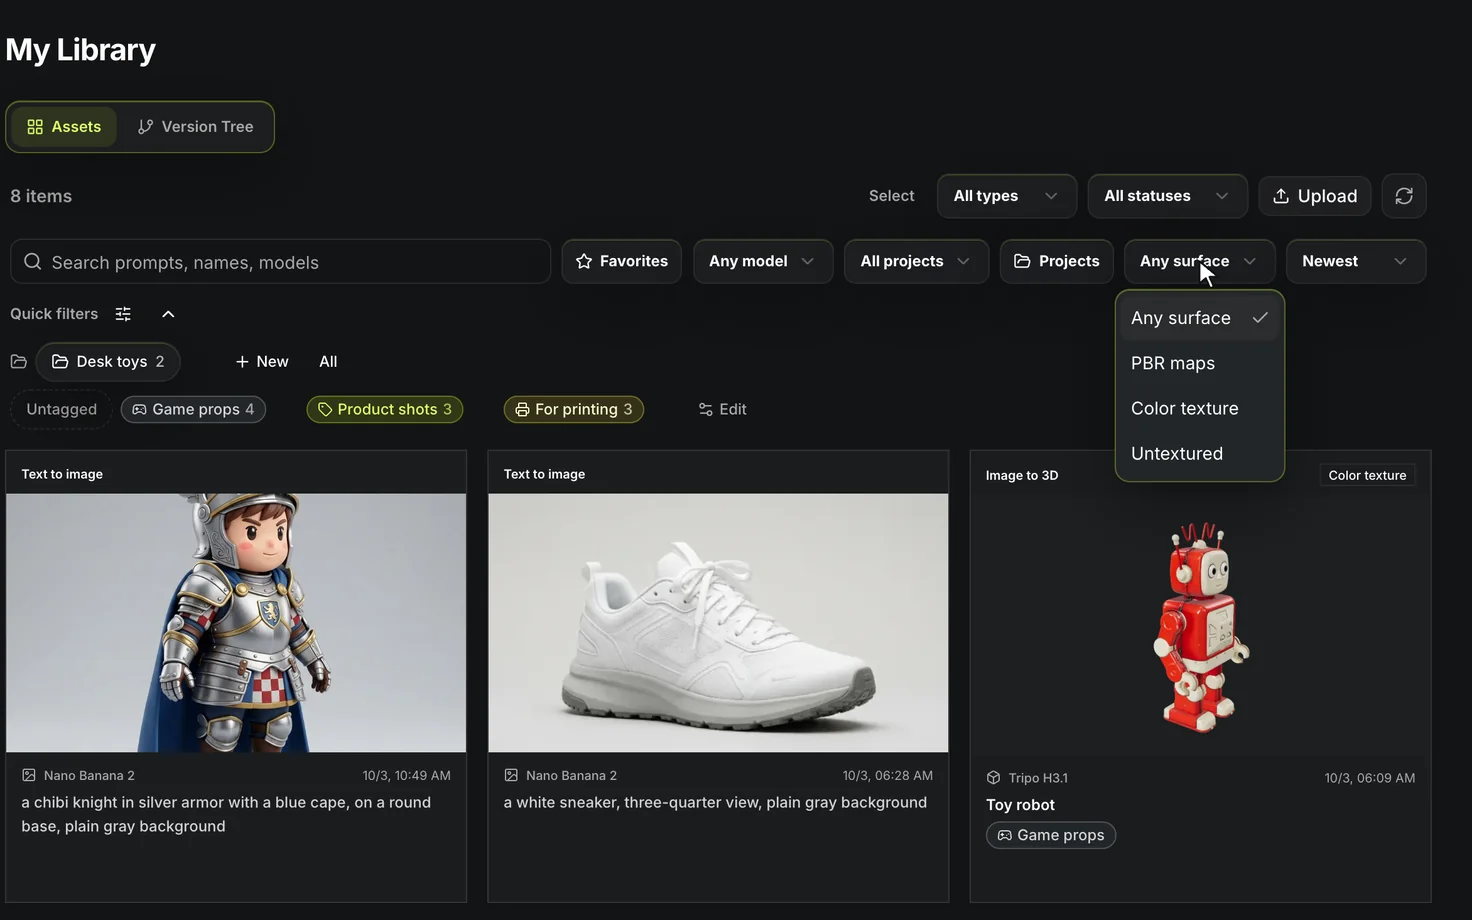
- Open My Library. Assets shows every run as a card; Version Tree shows which run each result came from.
- Search by prompt, name or model, and narrow the grid by media type, status, Favorites, project, model and, for 3D models, surface: PBR maps, Color texture or Untextured. Sort orders the grid by Newest, Oldest, Name or Model.
- Every filter is kept in the page address, so a reload, Back and Forward keep your place, and a link you copy opens the same view.
- A run that is still going says where it is (Queued, Generating… or Saving…) and turns into its result on its own.
Step 2: Tag creations
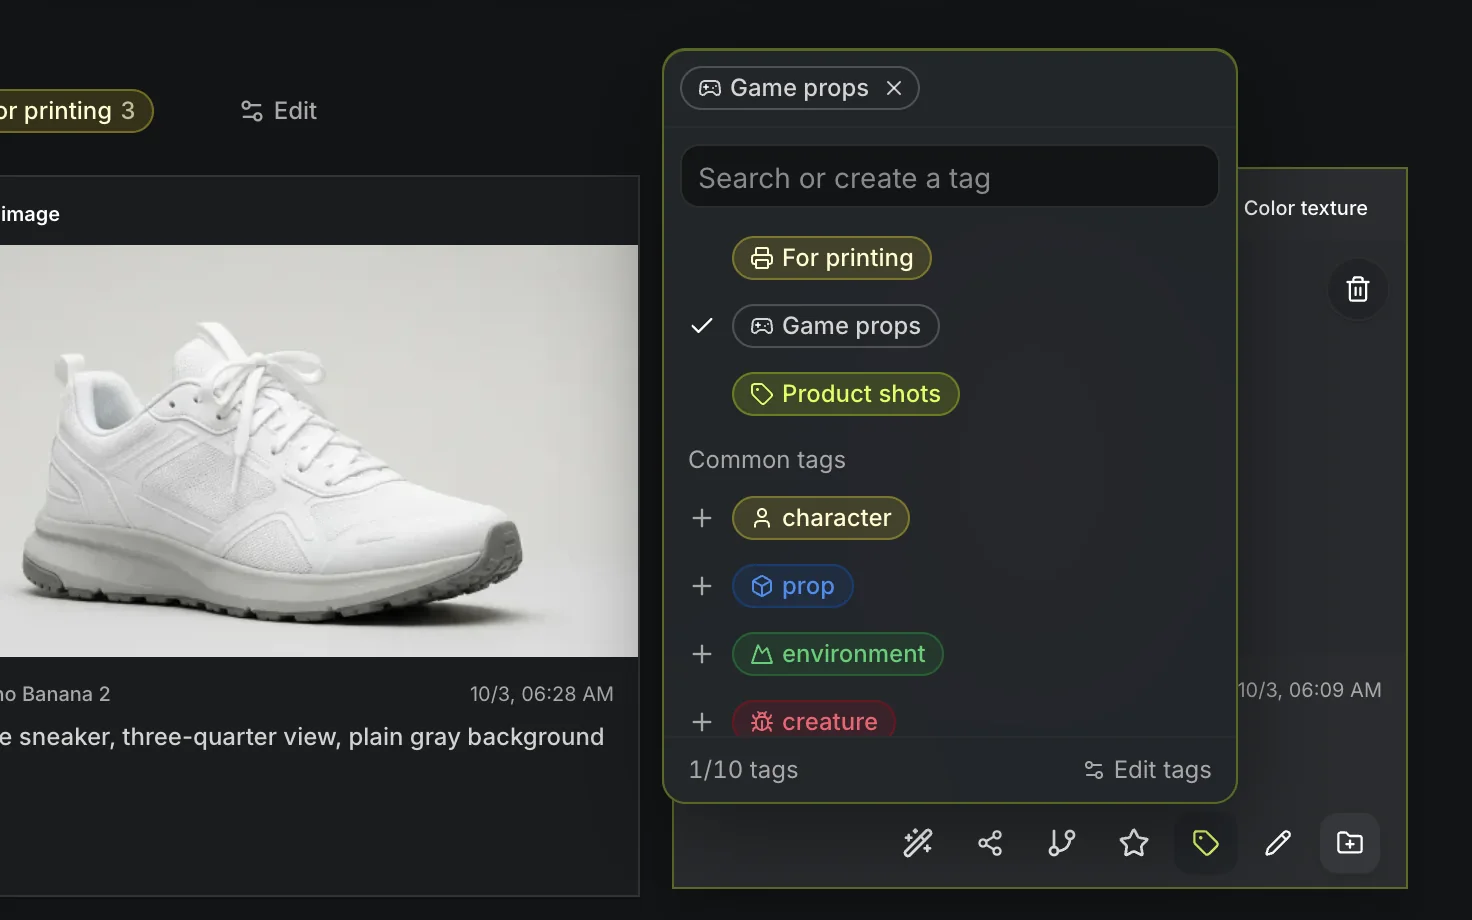
- Press the tag button on a card, or the one beside a finished run. Pick a tag or type a new one; a creation holds up to 10 tags, and the picker suggests your own tags that the prompt mentions.
- To tag many at once, press Select, tick the cards and press Tag in the selection bar. One bulk tag covers up to 100 creations.
- Filter by several tags, matching Any tag or Every tag, or press Untagged to see the creations that have none.
- Edit tags renames, recolors, merges two tags into the one you keep, and deletes a tag with its count shown first.
Step 3: File creations in projects
- Press Move to a project on a card, after a run, or in the selection bar for several cards at once. Start a project creates one on the spot.
- Projects lists your own projects (Mine), the ones shared in a team workspace, the ones you kept from someone's shared link (Saved from others), and Archived ones.
- Open a project to write About this project notes in markdown, up to 4,000 characters, see what it holds, and press Mark finished when the work is done; filter the list by All, Open or Finished.
Step 4: Keep projects and tags in Quick filters
Quick filters sits above the grid with a row of project pills and a row of tag pills. Each pill shows how many creations it holds, and pressing it filters the grid; pressing it again clears the filter.
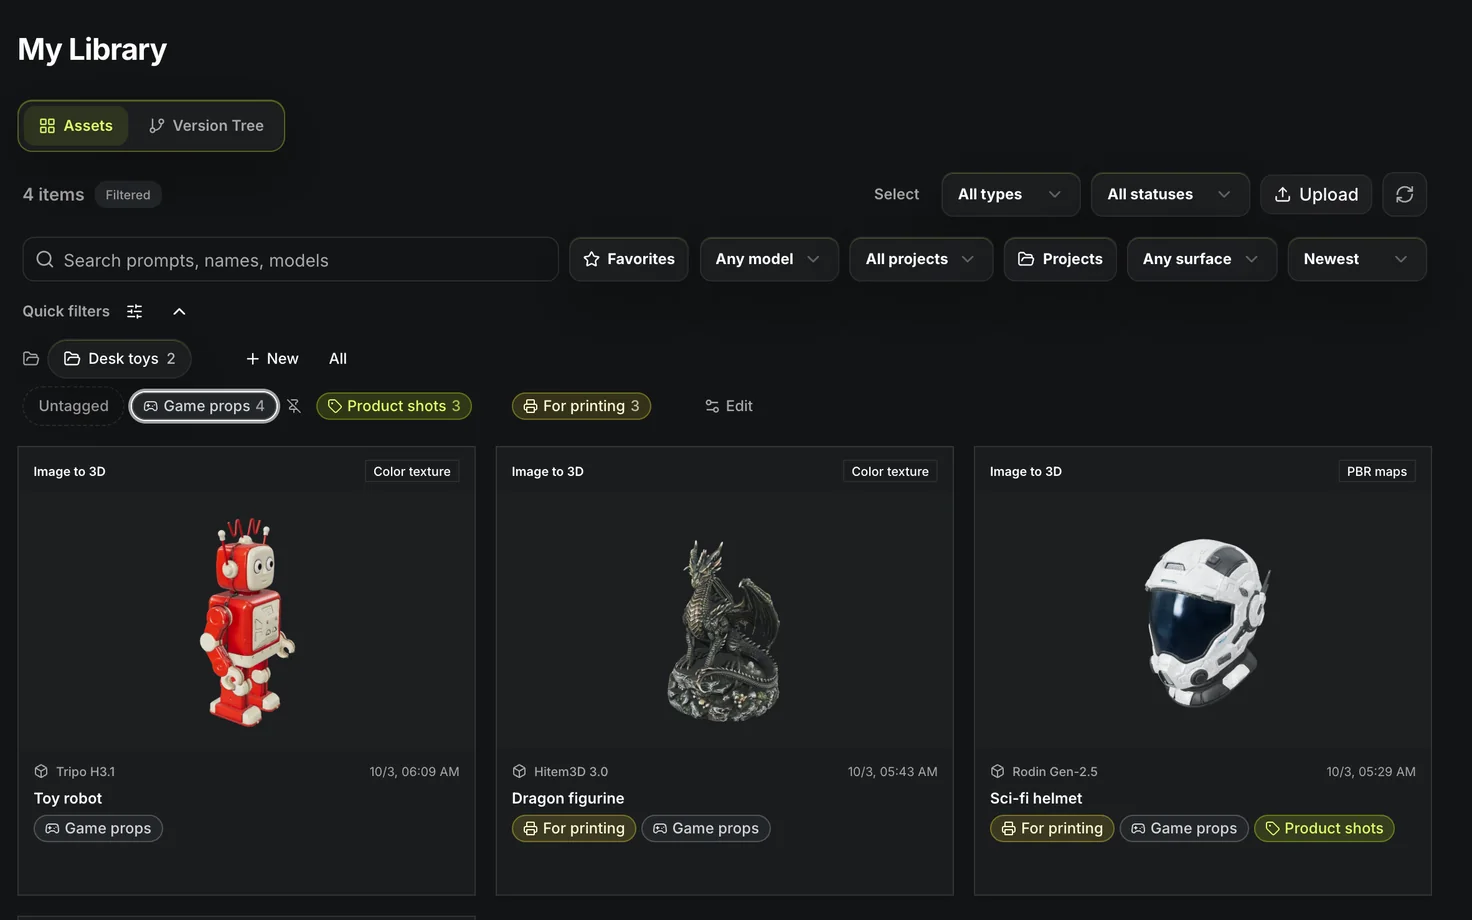
- Pin a project or a tag with the pin icon on its pill or in Edit tags and Projects. The bar holds up to 8 projects and 6 tags. Until you pin anything, it shows the projects and tags that hold the most creations.
- New on the project row creates a project and pins it. All opens every project.
- Drag a card onto a project pill to file it, or onto a tag pill to tag it. If the card is one of several selected cards, the whole selection moves. The bar says what happened, or why a project refused it.
- Drag a tag pill onto another, or press Alt with an arrow key on it, to reorder the tags.
- Choose what this bar shows turns the Projects row and the Tags row on or off, puts tags above projects, or keeps the bar folded. Your bar follows you to every device you sign in on.
On a phone the bar is one row you scroll sideways; use Move to a project and the tag button on a card instead of dragging.
Step 5: Work on one creation
Press a card to open it. The page address changes, so Back closes it again.
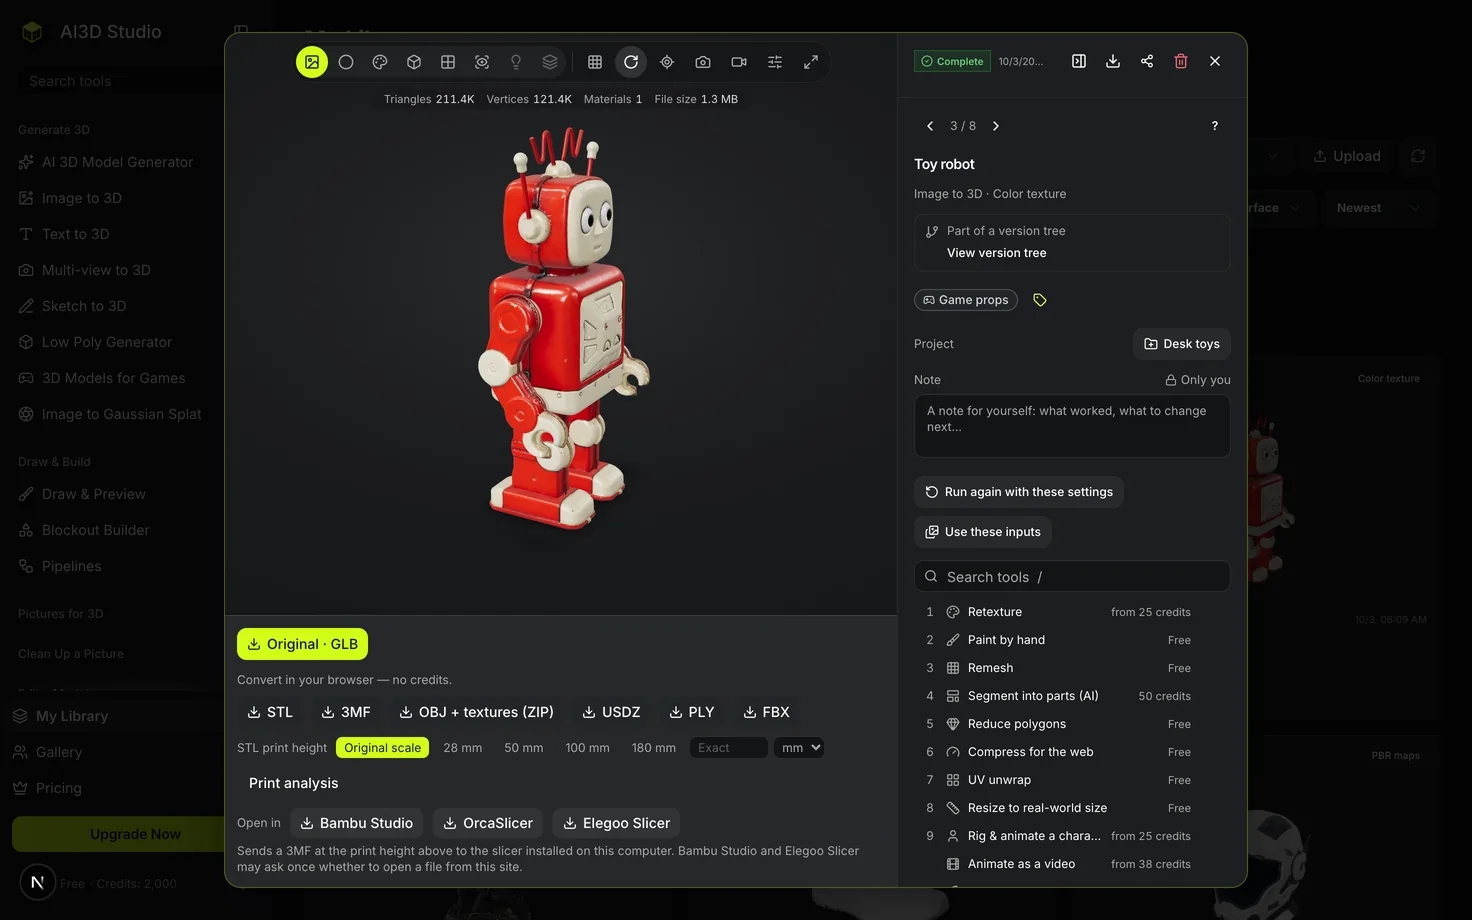
- The tool list shows what you can do next with this file, numbered so the number keys open the first nine. Pin up to 5 tools for 3D models and 5 for pictures, and they list first on every creation.
- Source opens the creation this one was made from, and Settings used lists the options the run used.
- Note keeps a few lines about this creation for yourself, such as what worked or what to try next. Only you can see it: it is not shown to your team, in a shared link or in the Gallery. It saves as you type.
- Run again with these settings opens the generator with the same model and options. If the model has been retired, its settings open on the model that replaced it, with a note. Use these inputs sends every picture of the run back to the generator.
- Keys: the arrow keys step to the previous or next creation, slash searches the tools, T opens the tags, Ctrl or ⌘ with K jumps to a recent run, the question mark lists the keys, and Esc closes.
On a phone the creation opens on three tabs: Edit, Export and Details.
Step 6: Use a creation as the next input
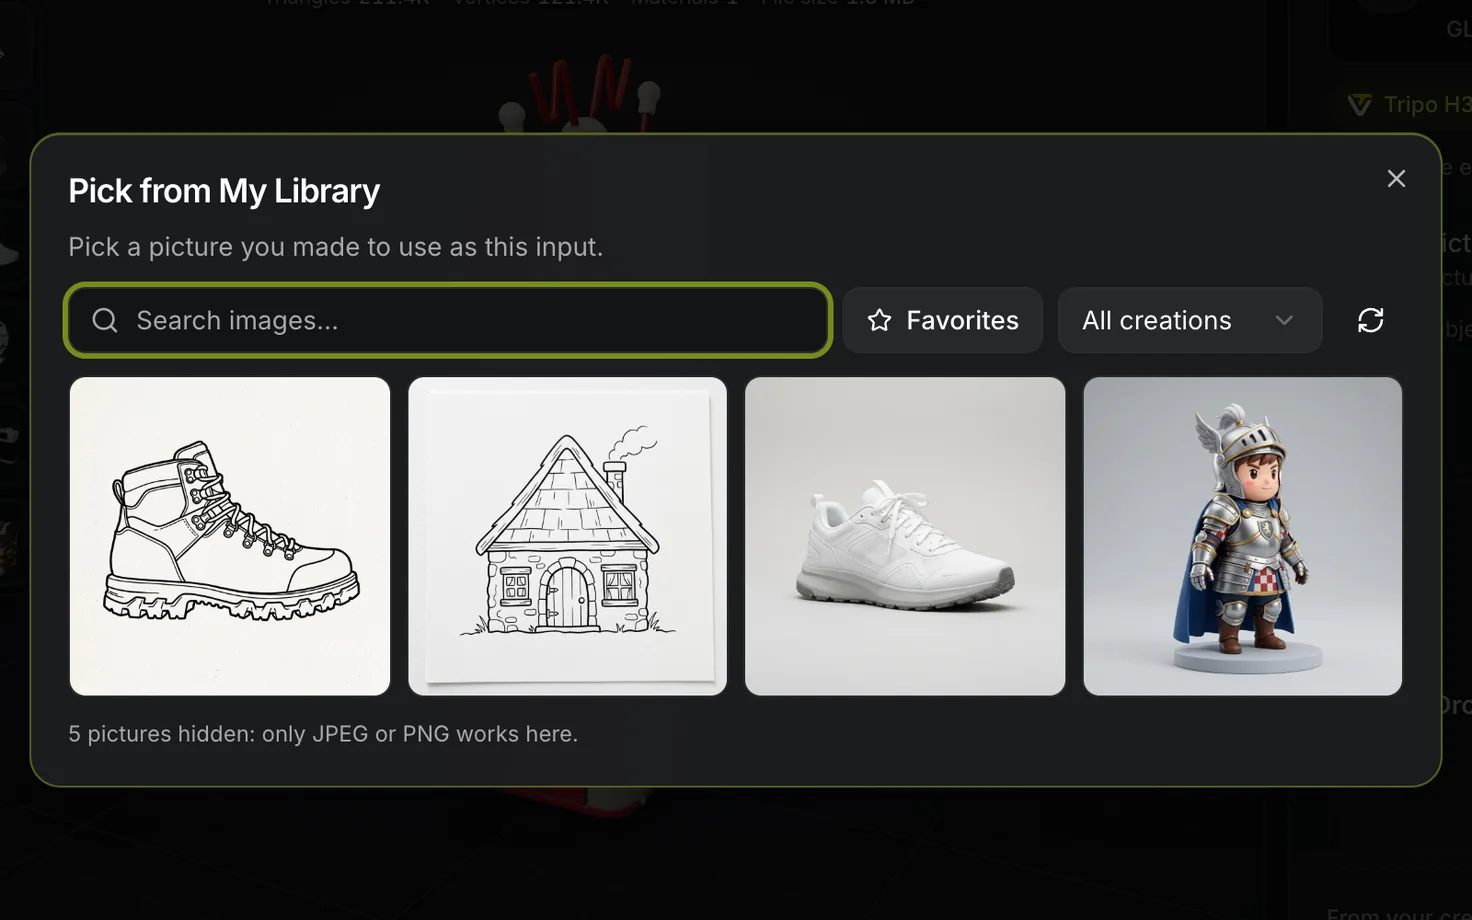
On a generator, the folder button in the corner of an upload box opens Pick from My Library. Search, show Favorites or one project, and pick a picture (or a 3D model, on a model field). It fills the field at once, and nothing is uploaded again.
The picker lists only files the chosen model can read. Tripo H3.1 takes JPEG or PNG, so a WebP picture is left out, and a line under the grid says how many were. To use one of those, choose a model that reads WebP, such as Hunyuan3D 3.1 Pro.
To show finished work to everyone, open it and choose Share to Gallery. To work on one Library with others, see Teams and the API.